Body – Awareness – The Exercises
by pre.
Our guided meditation this week introduces ten different light exercises. The track consists essentially of instructions on how to perform the exercise, which muscles to tense and relax and what patterns of movement to use, even how to synch your breathing with the movements. There’s also a smattering of reminders to pay attention to the way it feels to perform these movements, the signals from your body as you do so, and some suggestions that your kinaesthetic senses, posture, poise, balance and breathing are improving. You may wish to do the excercises in front of a mirror to help you check you’re performing the actions accurately and learn to improve your kinaesthetic senses through visual feedback, being able to see as well as feel while you pay attention to the way your body feels.
When we introduce the next seven meditations in this series, you’ll be expected to be performing essentially the same routine you will learn here, but we’ll barely mention the names of the exercises in those future mediations. You’ll use this meditation to learn to listen to your body, respond to it, and move as it demands while you follow those future meditations while performing essentially the same movements.
Of course, if you have any health issues you should consult with your doctor before beginning any exercise program
Breathing
Our new guided meditations are designed to help you to learn how to move, literally which muscle movement patterns are best able to support your weight, encourage full movement ability and keep the lungs inflated
Your posture effects the way you breathe, and the way your breathe effects how much oxygen your brain has, and effects posture in feedback. Your muscles learn patterns of movement which include a coordination of your whole body, including your breathing. Reflecting this importance of breathing control in this and coming meditations, each will have a breath track. You should try and keep your breathing synchronised with the backing music and the breath track will help you to keep track of this. It will drift in and out of audibility, but whenever you notice it you should try and ensure your breathing is in sync with the breath track. Breathe in when the breath track sucks, breathe out when it blows.
The Exercises
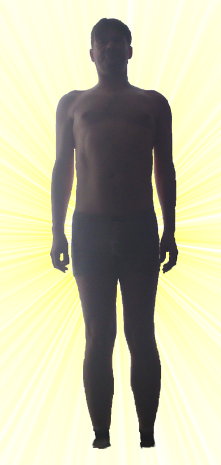
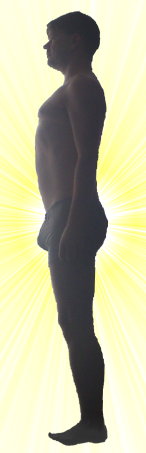
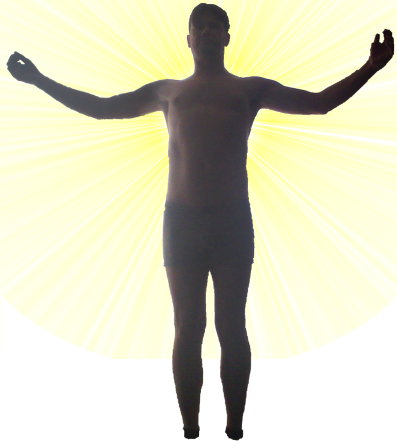
1 – Neutral Standing Posture
Stand with your feet a fist-width apart, rising up and elongating the spine, keep your shoulder blades relaxed, resting down into your back. Your neck should be straight and your face looking horizontally out in front of you. Imagine the plumb-line down the side of your profile described in the posture section. Keep your core stomach muscles pulled in and up to support the spine, pulling your tummy backwards and breathing deeply from the chest. Pay attention to how your body feels, constantly wiling your shoulders to rest down deeper into the back.
This exercise is designed to help you learn what good posture feels like, to know the natural position to which you should always return, to discourage slouching and improve balance.
As you get more advanced, you can add a neck-stretch, tilting your head sideways and stretching the neck muscles. Even rotate the neck around, letting your head drop forward and stretching all the muscles around the neck which support your head.
 |
 |
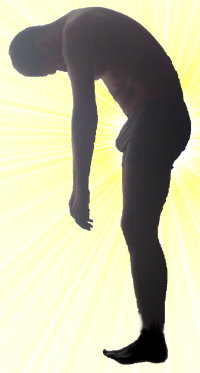
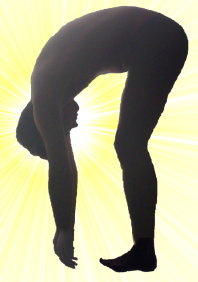
2 – Roll-down
Breathe in and ensure your stomach muscles are supporting your back then as you breathe out bend the knees very slightly and allow the head to fall forwards. When the muscles in the back of your neck are fully stretched, curve the spine slowly, one vertebra at a time, until you’ve bent down as far as you can. The whole time your shoulders and neck should be relaxed, allowing your head and arms to fall under gravity until you are (once you’re limber enough at least) touching your toes. When you reach the bottom, take a few deep breaths, maybe allowing your arms to freely swing like pendulums, then once again ensure your stomach muscles are zipped up before reversing the actions and slowly raising back to standing tall in the neutral position as you breathe out.
The Roll-down is designed to relax the muscles in your shoulders, arms, neck and spine, allowing gravity to stretch them out, while also stretching the muscles of the back. It should increase your control and kinaesthetic senses. As you pull back up you strengthen core stomach muscles and learn to return to a good posture.
 |
 |
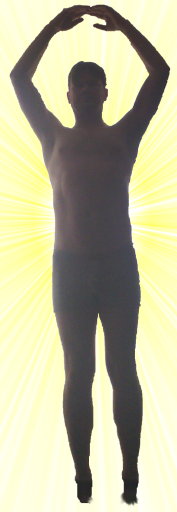
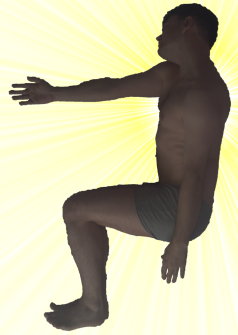
3 – Arm rises
As you breathe deeply in, move slowly to standing on tip-toes, while also raising your arms around your peripheral vision (hands always just in sight) till they meet above your head. Avoid pulling the shoulders up towards your ears, keeping them relaxed and lowered. As you breathe back out, reverse the actions so you end up back in the neutral posture.
Arm Rises should help your body learn the neutral position and use the full range of motion of muscles in the back of the legs as you stand slowly to tip-toe and back. It should also train your shoulder muscles to remain relaxed while you move your arms.
 |
 |
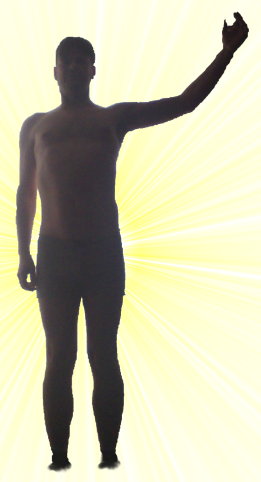
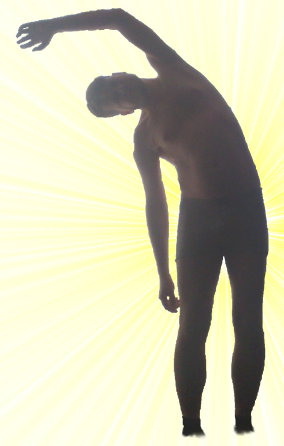
4 – Side Reaches
Start in the neutral standing position then engage your abs, pulling in the stomach and allowing the knees to bend very slightly. As you breathe out slowly let one arm raise outwards and up over your head. Then bend from the waist to allow your body to form a “C” shape and stretch the muscles at the side of your body. Keep stretching and elongating those muscles as you take a couple of deep breaths before reversing the actions to return to the neutral position. Then do the other side and repeat, being sure to do each side an equal number of times.
This exercise stretches the core muscles which support the back, and your neck and shoulder muscles. As usual, the more slowly you can breathe and perform the action and the more attention you pay to your body the more you’ll improve your kinaesthetic senses and balance.
 |
 |
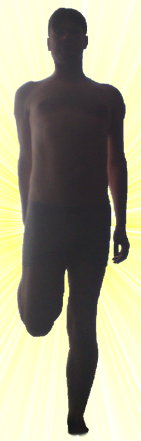
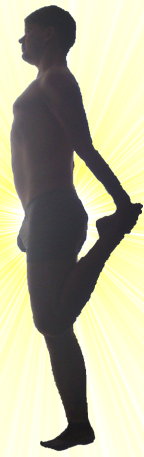
5 – Standing on one leg
Stand in the neutral position, and bend one knee so that your foot moves up behind you. Hold that foot with the hand on the same side as the body and, keeping the stomach tight to support the backbone and the neck muscles relaxed, pull the foot towards the bottom. Ensure your hips are not tilted and remain horizontal. Hold the position, paying attention to your balance, for a few deep breaths then switch sides and repeat. Remember to always treat each side equally.
This exercise stretches the Quadriceps and Hip Flexor muscles in the leg and some of the muscles in the arms while training your kinaesthetic senses and especially your balance.
As you get more advanced you may try to really test your balance by closing your eyes. Careful though, don’t fall over!
 |
 |
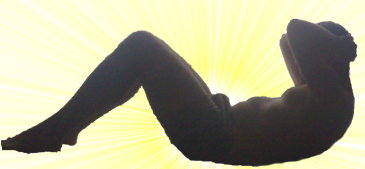
6 – Curl Ups
Now lie down either on the floor or a very firm bed. Take your head in your hands and move your feet towards your bottom so that your feet are flat on the floor and your knees at right angles. The curl-up is like a sit-up, but rather than repeating lots of them you slowly pull up as far as you can while you breathe out, holding you stomach muscles tight to support your back, and hold the position for a full deep breath in, out and back in again before lowering again as you breathe out one more. Relax while you breath back in, ensuring the stomach muscles remain tight and zipped up, before repeating. Try to keep your neck muscles relaxed the whole time.
The curl up should strengthen the core stomach muscles which support the back and hold the guts in. It will help you to learn the patterns of movement which should be involved to ensure the back is fully supported while you are moving, standing or even just sitting. The more slowly you can pull up into the curve, and the more curled up you can be (so long as you’re still holding in the stomach), the faster you’ll improve your kinaesthetic senses and your muscle strength.
 |
 |
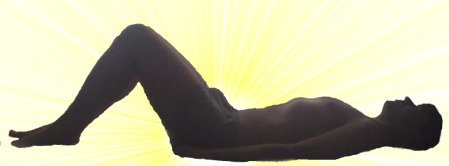
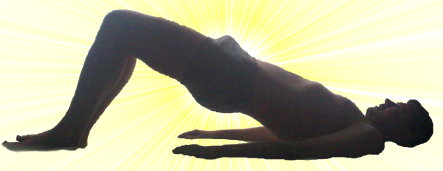
7 – Spine Curls
Move your feet backwards towards your bum so that the feet are flat on the floor and the knees bent roughly to right angles with the feet a fist width apart. Engage the stomach muscles to support the back then as you breathe out, tilt your hip-bones up so your tail-bone lifts off the floor, then slowly raise the hips, gradually peeling and curling the backbone off the floor one vertebra at a time, until you form a straight line from the knees, down the hips to the stomach and chest. Breathe in while holding that position before slowlyreversing the actions as you breathe back out again. Repeat. After many listenings, when you’ve got used to these movements, you may sometimes try bringing the heals together, pointing the toes outwards, opening the knees and doing the same to use the turn out muscles in your legs and bottom.
This exercise should increase your awareness of your spine, creating space between the vertebra, making you taller and letting the spinal fluids flow more easily. It should also help you learn to control the stabilizing muscles which support the lumber spine, keeping you aware of how to maintain that support as you move. It also works and strengthens the legs.
 |
 |
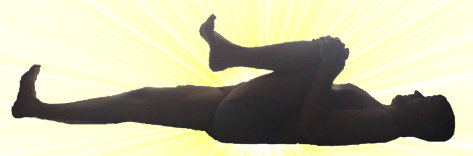
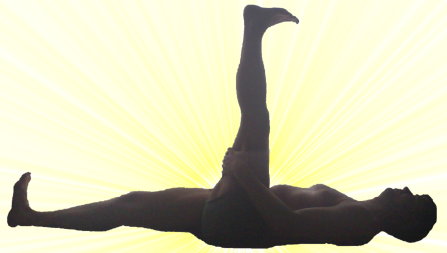
8 – Hip Flexor & Hamstring Stretches
Lie flat on your back, tensing the core muscles so that ideally there’s a small gap between the small of your back and the floor, stretching your legs out in front of you. Pull on one knee, hugging it into your chest for a few deep breaths. Then straighten that leg, pointing the heel as close to the roof as you can, holding the back of the thigh for a few deep breaths. Finally, point the toes and rotate the ankle for a breath or two before lowering the leg and repeating with the leg the other side.
These excercises stretch the hamstrings and other leg muscles, improve the range of motion available to the legs and should help you to learn better control over your lower limbs. They are particularly useful for people who sit much of the day.
 |
 |
 |
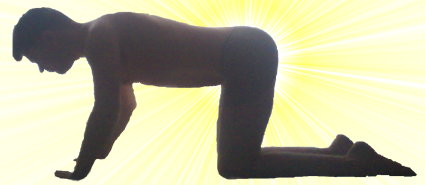
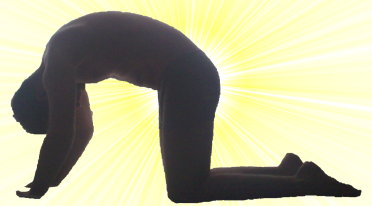
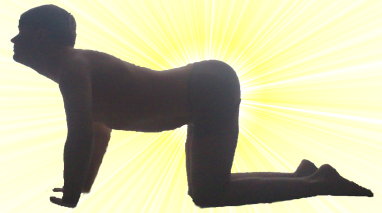
9 – The Cat
Roll over and onto all fours, adopting the four point kneeling position. Hands pointing forward directly under the shoulders, elbows slightly bent, certainly not locked. Knees at right-angles and a fist width apart, right underneath your hip sockets. Keep your back as straight as possible, like a table-top. Neck stretched long, looking at a spot a little way in front of your hands, making an equilateral triangle between the spot you’re looking at and the two hands. Hold this pose for a while, breathing deeply with your stomach muscles engaged, scooping your belly up towards the spine to support the back. After a while, as you breathe in, arch the back like a cat, letting the neck drop down and the hips tilt forward, stretching the middle of the back up towards the ceiling. As you breathe back in, reverse the curves, slowly and gently, looking up so the tail goes up and the waist goes down, lengthening and mobilising the spine, still pulling the stomach muscles tight to support it as it bends. Continue to swap these positions gradually as you breathe deeply.
The cat is designed to help you understand how your kinaesthetic senses are effected by different orientation, help you find that neutral straight-back position and so learn how to spread the load evenly around your body even in strange positions. Also to stretch and relax the muscles in your back and neck.
As you get more advanced you can, after arching your back each way for a while, return your back to a horizontal position, flat as a table-top, then begin to move one leg and the opposing (diagonally opposite) arm outwards, straightening and lengthening them stretching and holding them in position to improve your awareness of those joints before returning to neutral with the table-top back and trying the other arm/leg.
 |
 |
 |
10 – Chalk Circles
Roll over onto your side, putting your arms straight out in front of you, one on top of the other with back flat. Your legs should be in the sitting position, forming a right angle with your knees and hips. Breathe deeply in to prepare and engage your core stomach muscles to help keep your back straight. As you breathe out slide the top hand forward until you feel your muscles stretch between the shoulder blades, then as you breathe in draw a circle up and around your head with that hand. Keep it on the floor as it moves up and over your head, your arm fully extended the whole time. Twist your spine to allow the hand to continue to circle until it’s gone 180 degrees and is stretched out forming a straight line with the other arm. There, stop and relax as you breathe out. As you next breathe in, continue the circle around until your arm points down towards your feet. Relax and reach downwards, stretching the muscles in your arm and neck as you breathe out. Finally finish the circle to join the hands as you breathe back in. Repeat, then roll over and do it twice on the other side. Be sure to do an equal number of circles on each side of the body.
This exercise opens up the armpits and chest, stretches the muscles in the neck and keeps the range of movement of the arm hanging from the shoulder as wide as possible.
 |
 |
 |
Finish off
When the mediation is over, get slowly and carefully to your feet, shake the muscles to relax them and then spend a few seconds standing tall with the stomach muscles engaged, concentrating on your balance and the way your body feels. Then continue your day, trying to keep the core muscles strong and keeping tension out of your shoulders and neck. Allowing your posture to naturally readjust as you do the excercises more and more.
This is only a glimpse
As we mentioned at the beginning of our words about this track, we can only give you a small glimpse of the range of excercises which can keep your body limber, active and improve your balance and kinaesthetic senses. We really recommend at least a few weeks of a full Pilates, Tai-Chi, Alexander Technique or Yoga classes. Ideally try them all!
| Guided Meditation File 9 – Body – Body Awareness Backing Music “Touch Me” By Professior Kliq |
|||

|

|

|

|